5 curated frontend UI kits for your next web app

5 curated frontend UI kits for your next web app

Frontend UI kits enable developers to quickly launch digital products without having to consider the design language surrounding their coded components. They also enable UX designers to quickly iterate on product flows and test options during the MVP stage of product development.

Most great startups don’t find their perfect design language or color palette on their first iteration. With time and much customer feedback, those things fall into place as a product is assigned value by the market.

During the early MVP (minimum viable product) days, having a way for both the UX design side, and the coding side to quickly combine their efforts in a unified way increases group performance ten fold. UX kits provide that role.

Below, I’ve curated some of the best options currently available on the market, along with the pros and cons of each to help you better choose amongst them. At the end, I’ve also given you a custom option that, while initially time consuming, will enable you to create your own custom, quick-start UI kit for any future projects you begin.

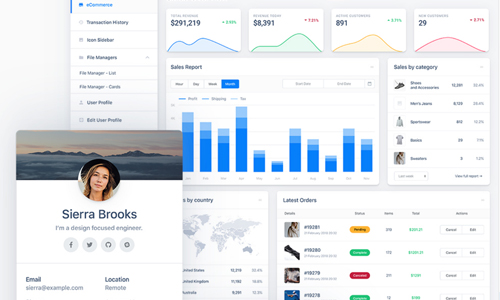
Shards by Design Revision

Price: Free & Premium
Framework: Bootstrap 4
Available for: Vue, React, Bootstrap HTML

(The FREE version includes some components that are NOT in the PRO version, so reference the demos of both if you are looking for something specific)


Pros:

  • Beautiful use of color, shadow and white space. Overall, this is one of the best-looking UI kits I’ve seen with many well-considered details
  • Includes a Sketch design file
  • Having personally used this in a few projects already, I can say that the documentation is robust and very easy to use
  • Plenty of components and layouts. Everything is easy to customize for whatever kind of web app you want to build. Components include a text editor, file management, blog layout, and many others

Cons:

  • Code is not quite as flushed out as some other options, but good developers probably won’t mind this
  • Sketch design file does not utilize symbols or responsive layout features

Xtreme Vuesax by WrapPixel

Price: Free & Premium
Framework: Bootstrap 4
Available for: Vue, React, Angular, Bootstrap HTML


Pros

  • Based on Vuesax, so you get the power of that kit and their user community of components out of the box
  • Includes light, dark, and color-based themes
  • Many components, including a drag-n-drop Trello-style UI and a form wizard for quick multi-page form creation
  • Some of the most comprehensive tables I’ve seen. If your app is table-heavy, definitely check this one out
  • Component code is quite extensive and not just stubbed out like many other kits
  • Quick-reference icon library

Cons

  • This isn’t the prettiest kit out there, but with a bit of customization you should be able to tailor it to your own style
  • Based on Vuesax (that’s right, it’s a pro and a con). According to Vuesax’s on website, it isn’t recommended to be used in a production level app, however depending on what you’re building, this still seems like a viable option, or a good choice for an MVP. Do your research and make the correct choice accordingly.
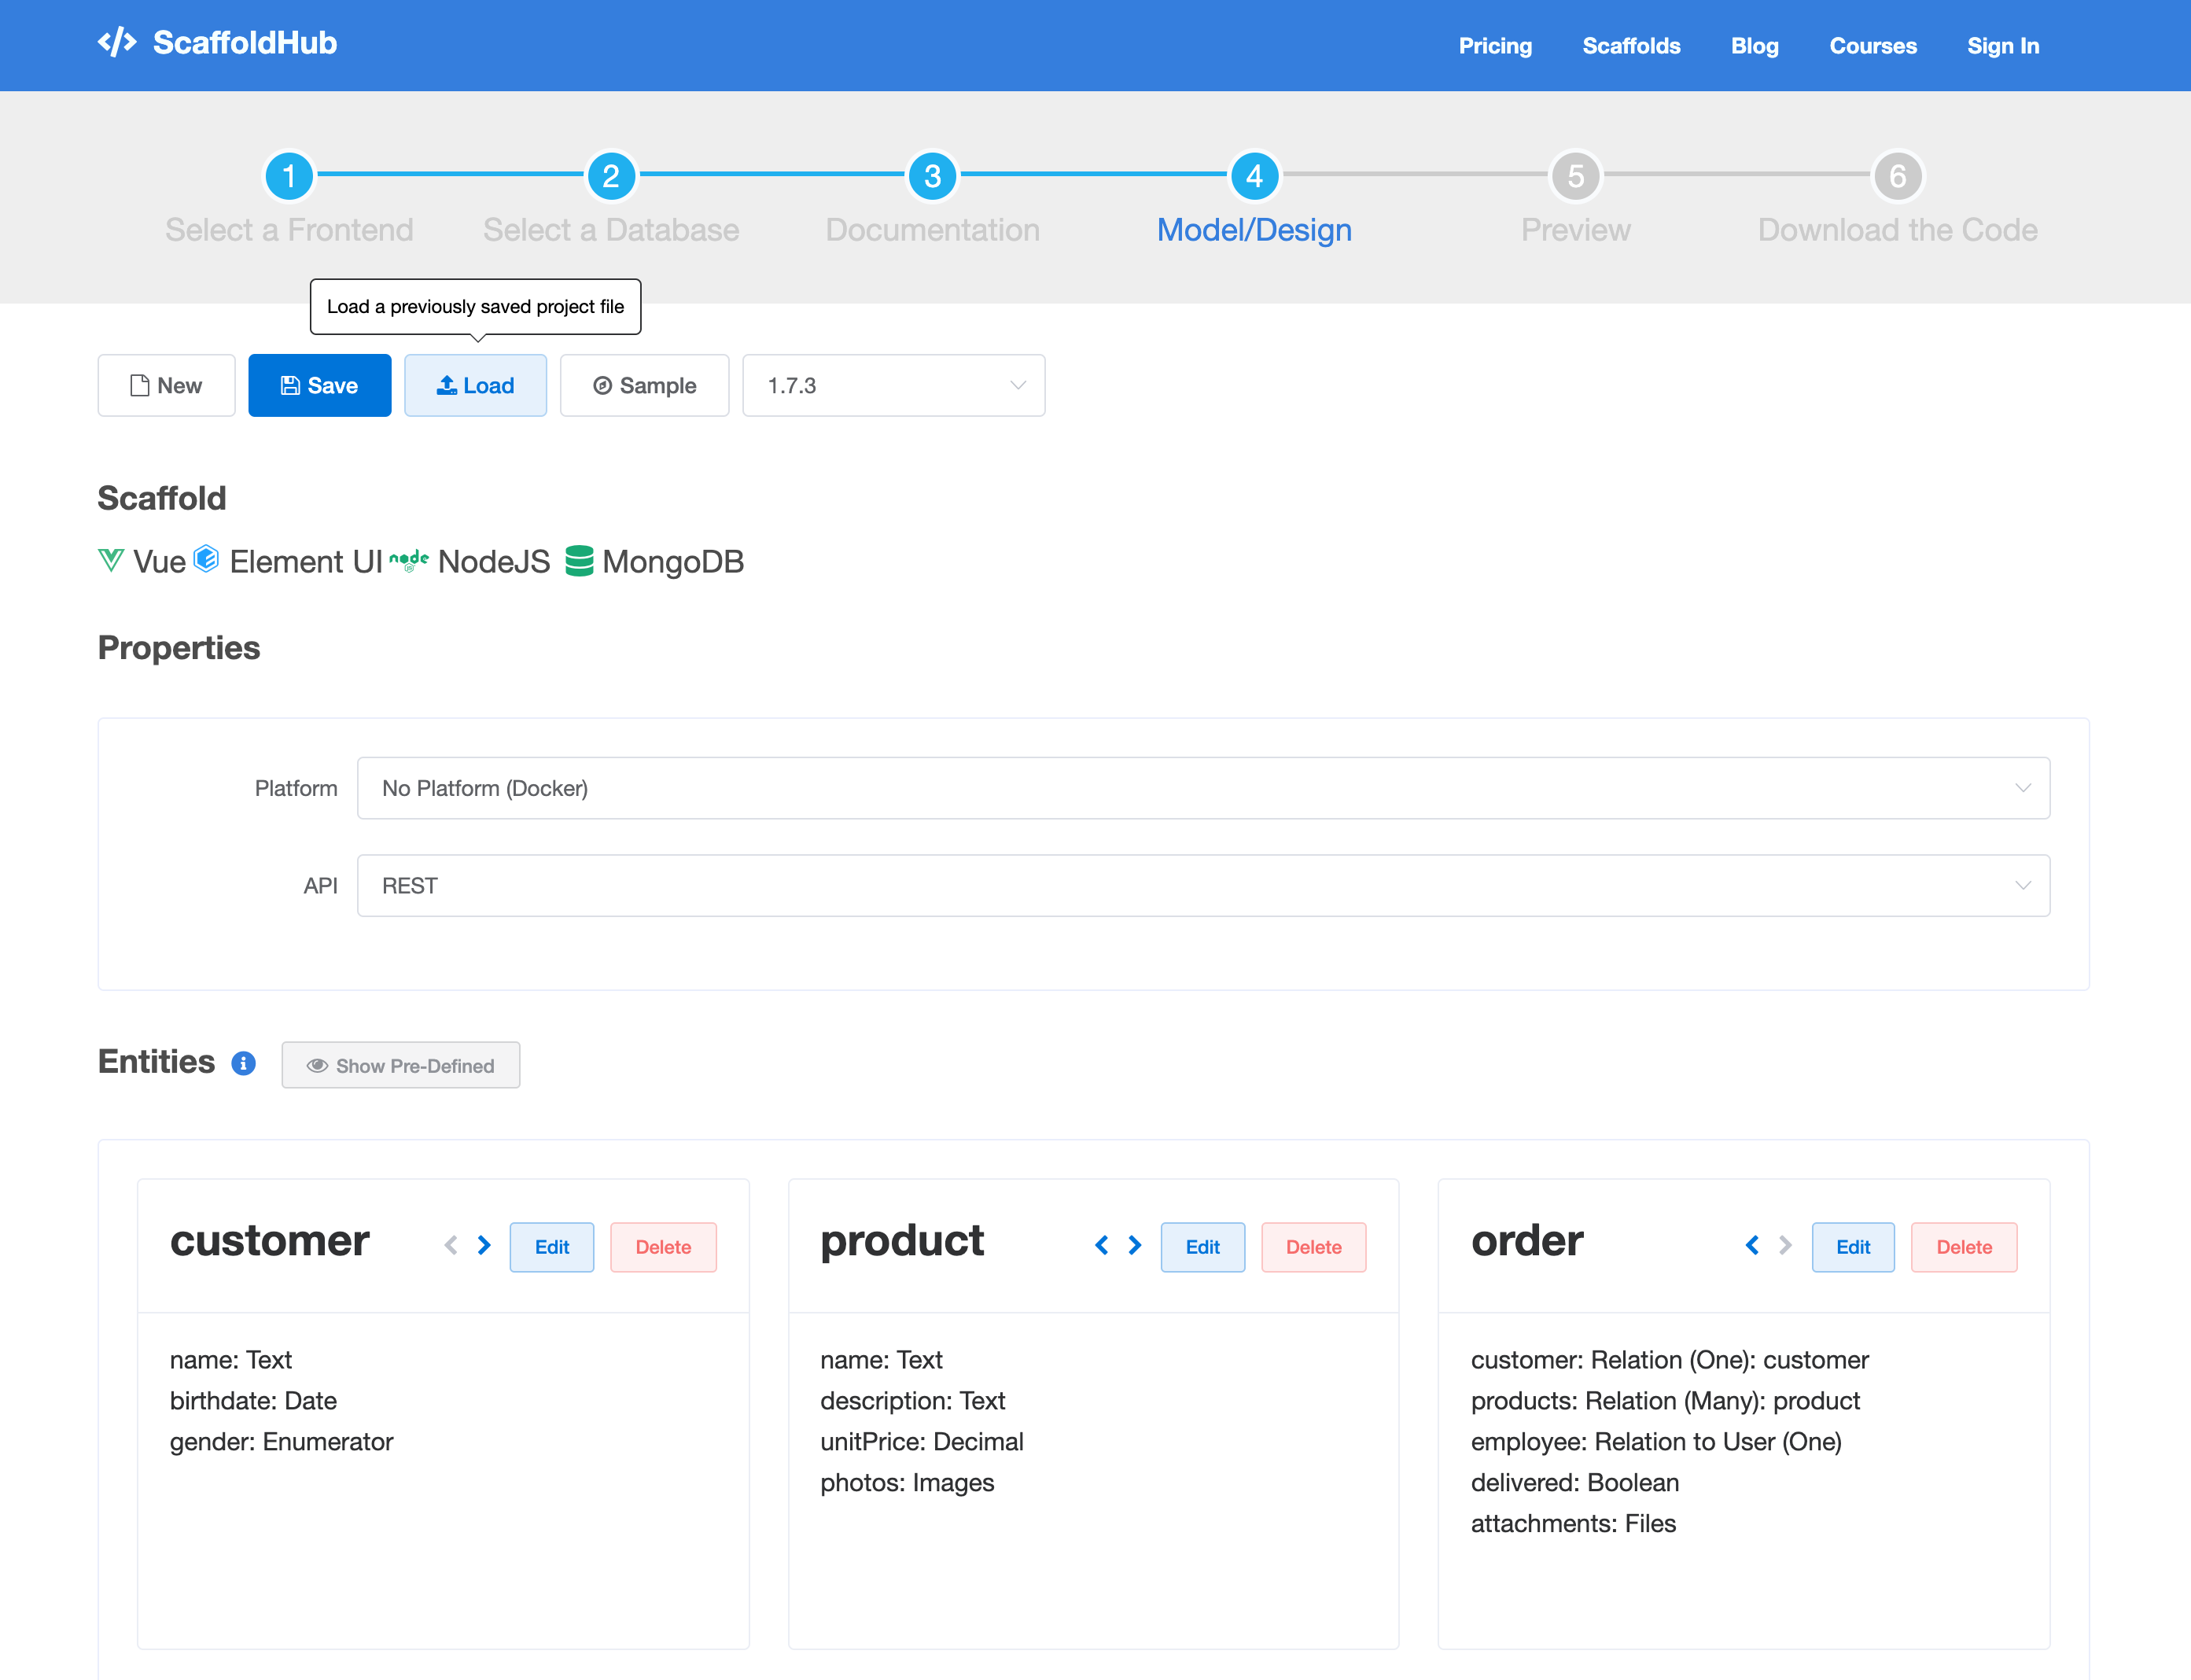
Element

Price: Free
Framework: Bootstrap 4
Available for: Vue, React, Angular


Pros

  • Create and download custom themes via their website
  • Includes a Sketch design file
  • Lots of components, including some that other kits lack, like form steps and file upload components
  • Includes animations with clean transitions
  • List rendering options including infinite scroll with smart loading
  • Utility naming is short and easy to remember
  • Available in ScaffoldHub which quickly generates project structures

Cons

  • Default language is Chinese. Setting to English requires some i18n settings
  • Doesn’t have much in the way of pre-made layouts or structured pages
  • Sketch design file does not utilize symbols or responsive layout features

Evergreen by Segment

Price: Free
Framework: UIBox (segment’s own CSS-in-JS framework)
Available for: React


Pros

  • Visual design is clean and simple
  • Minimal set of components
  • Created by Segment, meaning it will likely continue to be updated
  • Includes a Sketch design file

Cons

  • No pages or layouts included, just basic components here folks
  • Fairly verbose component names
  • Customization is somewhat limited on components like tables

Rebass

Price: Free
Framework: Reflexbox (Rebass’s own grid system)
Available for: React


Pros

  • Minimal kit of only essential components
  • Includes dark mode options
  • Increases the maintainability of visual styles
  • Stateless, functional UI components
  • Supports theming

Cons

  • Some devs may not like Reflexbox, but there are simple ways around that
  • Rebass’ CSS-in-JS styling may not be for everyone (it’s not for me)

Bonus #1:

Build Your Own (with a kickstart)

Price: Spend time now, save time later
Framework: Custom
Available for: Everything (!)

If you want to build quickly and launch your product ASAP, definitely go for a proven UI kit, especially if design isn’t on your list of skill sets.

However, after you’ve had experience with a few kits and understand how they work, I would urge you to move on to a minimal framework with which you can build out something to fit your unique needs. At the very least, you’ll learn a tremendous amount from the experience.

There are plenty of minimal, JS framework-agnostic CSS frameworks available for your choosing. SkeletonPureCSSMiniCSS, or Milligram are all great. However, there were things I both liked and disliked of each. One of the dislikes being the inclusion of a grid system.

Why? Because these days CSS Grid is supported on nearly every browser, and is both incredibly powerful and easy to learn. If you aren’t familiar, I recommend you watch this talk by Rachel Andrews.

To get everything I needed without the things I didn’t, I decided to build my own open source minimal CSS framework. I call it Blueframe, and you’re welcome to download it from my Github. It includes CSS Normalize while using many of the utility class names of Bootstrap for easier adoption. If you’re familiar with Bootstrap’s classes, you already know how to use Blueframe.

Is it worth going fully custom?

While full UI kits save you time by providing tons of components to build with right away, you’ll also spend time ripping out the pieces you aren’t using. Build sizes will also be larger (meaning longer compile times), and overriding default styles is often a frustrating, and sometimes impossible task.

Building your own UI kit enables you to develop a unique style that fits your design preferences, rather than looking like every other app on the market. Evergreen and Rebass are a great place to start, but if React isn’t your thing, starting from scratch with Blueframe, Tailwind, Skeleton, or any other minimal frontend framework is a great idea.

Pros

  • Grows with you and your style
  • Easily customize new projects from a single master file, and never worry about fighting bootstrap or any other framework’s default styles again
  • Forget complex grid systems and do everything with CSS Grid
  • UI kits might come with curated packages already installed, but sometimes spending the time to choose your own for tables, animations, alerts, and other elements means you’ll be getting exactly what you want without any of the fluff

Cons

  • Time consuming to start, but pays off in the end
  • Maintaining your UI kit can take second chair to getting projects done. For some, it may not be worth the time, while others may find it more efficient in the long-run

@Credit UxDesign.CC

Centos7 Monit configure to monitor disk space usage detail report

Centos7 Monit configure to monitor disk space usage detail report

These steps will guide how to add Disk Storage monitor report into the Monit web access

First, you need to know which drive you want to be included into the Monit  report by following command

df


For example here I have one partition /dev/vda1 and I want to monitor it with the usage detail.

Update the Monit configuration file

Now open the monit config file by the path: /etc/monit.d/storagespace 

Create that file if it is not existed. Paste the following content

check filesystem Ubuntu with path /dev/vda1
    if space usage > 90% then alert

If you have multiple volumes, easy that clone those 2 lines in multiple breakdown. Note that Ubuntu is the optional name you want to be showed as alias name in report.

Done, save it.

Check and Restart Monit process

Check the configuration file is ok by command

sudo monit -t

It will output *Control file syntax OK* means fine, otherwise try to review again your config file.

Restart monit service

systemctl restart monit

Check for status of service

systemctl status monit


So everything is fine, now point to web browser to access monit report, by default port is 2812 and your url will look like http://<host>:2812


The monit monitoring my disk right now, so click on it will go to details


Finished!

How to use Async Await in JavaScript.

How to use Async Await in JavaScript.

JavaScript is a bit like The Faceless Men of the programming world.

It can be Asynchronous. It can be Functional. It can be Object-oriented. It can be Client-side. It can be Server-side. The list goes on.

This article will focus on Asynchronous JavaScript.

But wait, JavaScript is a synchronous language!

This means only one operation can be carried out at a time. But that’s not the entire picture here. There are many ways JavaScript provides us with the ability to make it behave like an asynchronous language. One of them is with the Async-Await clause.

What is async-await?

Async and Await are extensions of promises. If you are not clear with the concepts of Promise, you can refer my previous post How to write Promises in JavaScript.

Async

Async functions enable us to write promise based code as if it were synchronous, but without blocking the execution thread. It operates asynchronously via the event-loop. Async functions will always return a value. Using async simply implies that a promise will be returned, and if a promise is not returned, JavaScript automatically wraps it in a resolved promise with its value.

async function firstAsync() {
  return 27;
}

firstAsync().then(alert); // 27

Running the above code gives the alert output as 27, it means that a promise was returned, otherwise the .then() method simply would not be possible.

Await

The await operator is used to wait for a Promise. It can be used inside an Async block only. The keyword Await makes JavaScript wait until the promise returns a result. It has to be noted that it only makes the async function block wait and not the whole program execution.

The code block below shows the use of Async Await together.

async function firstAsync() {
    let promise = new Promise((res, rej) => {
        setTimeout(() => res("Now it's done!"), 1000)
    });

    // wait until the promise returns us a value
    let result = await promise; 
  
    // "Now it's done!"
    alert(result); 
    }
};firstAsync();

Things to remember when using Async Await

We can’t use the await keyword inside of regular functions.

function firstAsync() {
  let promise = Promise.resolve(10);
  let result = await promise; // Syntax error
}

To make the above function work properly, we need to add async before the function firstAsync();

Async Await makes execution sequential

Not necessarily a bad thing, but having paralleled execution is much much faster.

For example:

async function sequence() {
  await promise1(50); // Wait 50ms…
  await promise2(50); // …then wait another 50ms.
  return "done!";
}

The above takes 100ms to complete, not a huge amount of time but still slow.

This is because it is happening in sequence. Two promises are returned, both of which takes 50ms to complete. The second promise executes only after the first promise is resolved. This is not a good practice, as large requests can be very time consuming. We have to make the execution parallel.

That can be achieved by using Promise.all() .

According to MDN:

The Promise.all() method returns a single Promise that resolves when all of the promises passed as an iterable have resolved or when the iterable contains no promises. It rejects with the reason of the first promise that rejects.

Promise.all()

async function sequence() {
    await Promise.all([promise1(), promise2()]);  
    return "done!";
}

The promise.all() function resolves when all the promises inside the iterable have been resolved and then returns the result.

Another method:

async function parallel() {    // Start a 500ms timer asynchronously…
    const wait1 = promise1(50);     // …meaning this timer happens in parallel.
    const wait2 = promise2(50); 
  
    // Wait 50ms for the first timer…
    await wait1; 
    
    // …by which time this timer has already finished.
    await wait2; 
  
    return "done!";}

Async Await is very powerful but they come with caveats. But if we use them properly, they help to make our code very readable and efficient.

I hope you have learned something new! If you found this article useful, be sure to share, clap, follow and support!

Credit @Medium

How to write Promises in JavaScript

How to write Promises in JavaScript

Almost anyone who has used JavaScript, had a love/hate relationship with it at some point. JavaScript is like that girlfriend who is frustrating at times but has something about her which keeps us intrigued. JavaScript has a galore of interesting topics and concepts to explore. Let’s start with one of them- Promises.

JavaScript is a synchronous programming language, but because of callback functions we can make it work like an Asynchronous Programming language.

Promises

Promises in javascript are very similar to promises made in real life.

Definition of promise -Google
  1. After a promise is made, we get an assurance about ‘something’ and we can plan accordingly.
  2. They can be kept or broken.
  3. We can’t act on them immediately. Only after the promise is kept.

According to MDN:

The Promise object represents the eventual completion (or failure) of an asynchronous operation, and its resulting value.

Playing with promises has 2 parts-

  1. Creation of Promises
  2. Handling of Promises

Creation

Promises have the basic blueprint

new Promise( /* executor */ function(resolve, reject) { ... } );
                                                               --MDN

The executing function(executor) accepts two parameters resolve and reject which in turn are callback functions. Promises are used for handling asynchronous operations also called blocking code, examples of which are DB, I/O or API calls, which are carried out by the executor function. Once that completes it either calls resolve on success or reject function on error.

Simple example

let promise = new Promise(function(resolve, reject) {if(promise_kept)
  resolve("done");else
  reject(new Error("…"));
  
});

As it can be seen, Promises don’t return values immediately. It waits for the success or failure and then returns accordingly. This lets asynchronous methods return values like synchronous ones. Instead of returning values right away, async methods supply a promise to return the value.

The above paragraph makes one thing clear, It has states!

A promise can be one of these states-

  1. pending — This is the initial state or state during execution of promise. Neither fulfilled nor rejected.
  2. fulfilled — Promise was successful.
  3. rejected — Promise failed.

The states are quite self-explanatory so won’t go in detail. Here is a screenshot for reference.

Handling and Consuming the Promise

In the last section we saw how Promises are created, now let’s see how the promise can be consumed.

const isDone = new Promise()
//...

const checkIfDone = () => {
  isDone
    .then(ok => {
      console.log(ok)
    })
    .catch(err => {
      console.error(error)
    })
}

Running .checkIfDone() will execute the isDone() promise and will wait for it to resolve, using the then callback. If there is an error it will be handled in the catch block.

Chaining Promises

A promise can be returned to another promise , creating a chain of promises. If one fails all others too. Chaining is very powerful combined with Promise as it gives us the control of the order of events in our code.

new Promise(function(resolve, reject) {

  setTimeout(() => resolve(1), 1000); 

}).then(function(result) { 

  alert(result); 
  return result * 3;

}).then(function(result) { 

  alert(result); 
  return result * 4;

}).then(function(result) {

  alert(result); 
  return result * 6;

});

All of the operations return there results to the next then() function on resolve and this process continues till the chain is complete. The last element in the chain return the final result.

Conclusion

This was just a basic gist of JavaScript promises. Promises can do a lot more if used in the right way and the right place.

Credit @Medium

Node.js, MySQL and async/await

Node.js, MySQL and async/await

Writing asynchronous applications in Node.js can be hard to learn, but except for some really simple cases, it cannot be avoided. Accessing a database is an example of an operation which is asynchronous by nature. It means that you have to wait for the results of a query, but while waiting, your program will continue to execute. For example, it can do some calculations or send another query to the database in parallel.

In a traditional, synchronous programming language like PHP, you could simply write:

$result = $connection->query( 'SELECT * FROM users WHERE id = 1' );

In JavaScript, you have three options to write asynchronous code:

1. Using callbacks:

db.query( 'SELECT * FROM users WHERE id = 1', ( err, rows ) => {
  // ... use the result ...
} );

2. Using promises:

db.query( 'SELECT * FROM users WHERE id = 1' ).then( rows => {
  // ... use the result ...
} );

3. Using the await keyword:

const rows = await db.query( 'SELECT * FROM users WHERE id = 1' );

At first, the difference seems purely cosmetic. It’s just different syntax for achieving the same thing. The differences become more obvious when you try to do something more complex.

Limitations of callbacks and promises

In my earlier article, Node.js, MySQL and promises, I gave an example of executing a few queries, one after another, and subsequently closing the connection.

When using plain callbacks, this requires nesting the callback functions and checking the error result in each function, which leads to a “callback hell”.

With promises, the code becomes more elegant, because you can chain multiple then() handlers and use one catch() handler for all errors. However, extracting the query results and closing the connection regardless of a success or error still requires some effort.

The situation becomes even worse when you have to introduce loops and conditions into an asynchronous code. Imagine the following hypothetical synchronous pseudocode:

const users = db.query( 'SELECT * FROM users WHERE id = 1' );
for ( const i in users ) {
  users[ i ].groups = db.query( '...' );
  if ( users[ i ].is_admin )
    users[ i ].modules = db.query( '...' );
}

Implementing this code asynchronously with callbacks would be hard and would make the code almost unreadable. Unfortunately, promises don’t make this much easier:

db.query( ‘SELECT * FROM users WHERE id = 1' ).then( users => {
  let loop = Promise.resolve();
  for ( const i in users ) {
    loop = loop.then( () => db.query( '...' )
      .then( groups => users[ i ].groups = groups ) );
    if ( users[ i ].is_admin ) {
      loop = loop.then( () => db.query( '...' )
        .then( members => users[ i ].members = members ) );
    }
  }
  return loop.then( () => users );
} );

The above code would probably work as intended, but it’s not very readable. When asynchronous operations are dynamically chained like this, it’s hard to determine the order in which they will be executed.

The async/await way

Here’s the same code implemented using the await keyword:

const users = await db.query( 'SELECT * FROM users WHERE id = 1' );
for ( const i in users ) {
  users[ i ].groups = await db.query( '...' );
  if ( users[ i ].is_admin )
    users[ i ].modules = await db.query( '...' );
}

As you can see, it’s almost identical to the synchronous example. It uses traditional programming constructs, such as loop and conditionals, and the execution order becomes obvious. That’s why it’s very easy to read and write such code.

Error handling is also more explicit, because you can use constructs like try/catch and try/finally. This makes it easier to see which error handler is associated with a particular block of code.

When you are just beginning to use it, the async/await syntax seems like some dark magic. It’s important to understand that it’s actually just syntactic sugar for regular promises which are used behind the scenes. This means that you can freely mix promises with async/await.

An async function is simply nothing more than a function that is guaranteed to return a promise. You can use it like any other function which returns a promise:

async function foo() {
  return 42;
}foo().then( result => console.log( result ) );

This code will print 42.

On the other hand, within an async function, you can use the await keyword with any promise, not only to call other async functions:

const foo = Promise.resolve( 42 );console.log( await foo );

This will print 42 as well.

This is very important, because we can wrap any existing function which uses callbacks to return a promise, and call that function using the async/await syntax.

Using async/await with MySQL

Let’s create a simple promise based database wrapper using the mysql module for Node.js:

const util = require( 'util' );
const mysql = require( 'mysql' );function makeDb( config ) {
  const connection = mysql.createConnection( config );  return {
    query( sql, args ) {
      return util.promisify( connection.query )
        .call( connection, sql, args );
    },
    close() {
      return util.promisify( connection.end ).call( connection );
    }
  };
}

It’s similar to the Database class I implemented in the previous article, only this time it’s a factory function instead of a class, and it uses the promisify() utility function to keep things simple. But it works the same, so both the query() and close() functions return a promise.

The example code from the previous article can be rewritten using async/await:

const db = makeDb( config );
try {
  const someRows = await db.query( 'SELECT * FROM some_table' );
  const otherRows = await db.query( 'SELECT * FROM other_table' );
  // do something with someRows and otherRows
} catch ( err ) {
  // handle the error
} finally {
  await db.close();
}

We can add support for transactions by promisifying the beginTransaction()commit() and rollback() functions in our database wrapper:

return {
  ...,
  beginTransaction() {
    return util.promisify( connection.beginTransaction )
      .call( connection );
  },
  commit() {
    return util.promisify( connection.commit )
      .call( connection );
  },
  rollback() {
    return util.promisify( connection.rollback )
      .call( connection );
  }
};

The above code rewritten to use transactions looks like this:

const db = makeDb( config );
try {
  await db.beginTransaction();
  const someRows = await db.query( 'SELECT * FROM some_table' );
  const otherRows = await db.query( 'SELECT * FROM other_table' );
  // do something with someRows and otherRows
  await db.commit();
} catch ( err ) {
  await db.rollback();
  // handle the error
} finally {
  await db.close();
}

To avoid repeating this boilerplate code every time, we can create a helper function which executes arbitrary asynchronous code within a transaction:

async function withTransaction( db, callback ) {
  try {
    await db.beginTransaction();
    await callback();
    await db.commit();
  } catch ( err ) {
    await db.rollback();
    throw err;
  } finally {
    await db.close();
  }
}

As you can see, the callback parameter is expected to be a function returning a promise.

With this helper function, the above code can be simplified to this:

const db = makeDb( config );
try {
  await withTransaction( db, async () => {
    const someRows = await db.query( 'SELECT * FROM some_table' );
    const otherRows = await db.query( 'SELECT * FROM other_table' );
    // do something with someRows and otherRows
  } );
} catch ( err ) {
  // handle error
}

Here we use the async keyword with an arrow function to easily create an asynchronous callback function.

Final notes

From my experience, once you get used to writing code using async/await, it’s hard to imagine how you could live without it. However, to be able to write asynchronous code, you still need to understand promises, and in order to use promises, you need to understand callbacks.

Note that the async/await syntax only works in Node.js version 8 or newer, so if you are still using an older version, you should consider updating it.

You can also use async/await in client side code if you are targetting modern browsers. If you have to support IE, it’s also possible with the help of transpilers and polyfills, but that’s outside of the scope of this article.

@Credit CodeBurst.io